
Dedicated to the Promotion and Preservation of American Muscle Cars, Dealer built Supercars and COPO cars. |
|
|||||||
| Register | Album Gallery | Thread Gallery | FAQ | Community | Calendar | Become a Paid Member | Today's Posts | Search |


|
|
|
Thread Tools | Display Modes |
|
#11
 12-21-2020, 11:48 PM
|
||||
|
||||
|
About the time I had the engine/trans in, we found a different home and placed an offer that was accepted with a closing date only 30 DAYS away !! That put the HURRY on the rest of the front clip. After the chemical stripping, the metal was too smooth for the SPI to hold. Barry recommends 80 grit sand on bare metal for "tooth". I wasn't going to hand sand everything, so I took it to a local blaster and stressed that all it needed was a light texturing. He was a little perplexed, as it was all bare steel, but understood what I wanted and kept the nozzle back quite a ways and it came out nice.
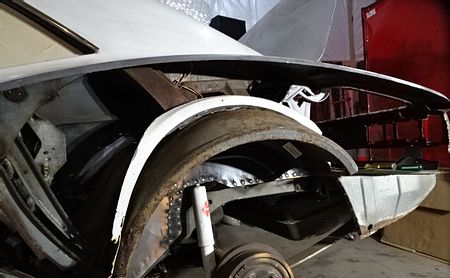
I knew the left fender had more than it's fair share of bondo in it but I didn't expect what I found when it came back from chemical stripping. That poor fender was a crinkled mess. The leading edge was crushed and folded and had been shaped out of filler. I don't have much in the way of metal shaping skills to save the fender, but I tried and it had to go back on the car, so it did get epoxy primer and jamming of the original Granada Gold. 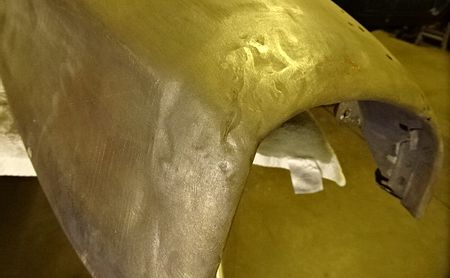     Shortly before we signed a contract on the other house I had been in negotiations with Camaro Specialties near Buffalo NY for an NOS left rs fender. I did a 38 hour run out there just before we moved and brought it back.   I threw the rear axle back under the car and a patch panel in the left rear foot well and then the car was ready to be moved.  And that is where it stayed until last weekend. I had no heat in my new, to me, pole building and spent all summer, and a good chunk of change, insulating, stepping the trusses for an overhead door, ceiling panels and heat. I now have a very comfortable shop to work in again this winter. Seems the only pic I have showing most of the shop is with my '66 Chevelle.  I backed the Camaro in and marked where I wanted to cut the quarter off for a new skin and outer wheel house sections. The 2 rust holes weren't that bad and I could have used patches, but the entire length of the panel has filler from an old crease. NOT going to fight with that.  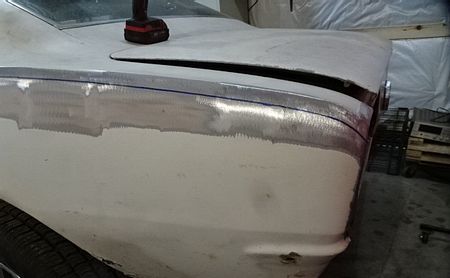 So off it came... 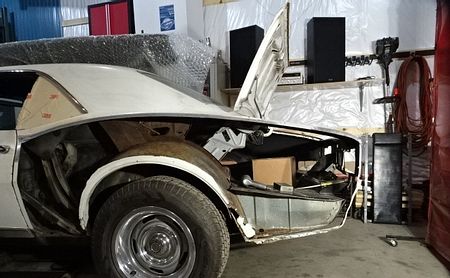
__________________
Mitch 1970 Chevelle SS 1966 Chevelle SS 1967 Camaro ss/rs 1938 Business coupe, street rod 2000 FXSTS, original owner, 13k miles 
|
|
#12
12-22-2020, 03:17 AM
|
||||
|
||||
|
I drilled all the spot welds out at the tail panel, trunk drop and outer wheel house.
  I cut off the wheel house from the drop down.  The bottom weld flange of the quarter panel was buried in sealer, so I scrapped that out and discovered the diagonal brace in that area was spot welded on top of the quarter. I removed the brace for access to the flange welds and drilled them out. 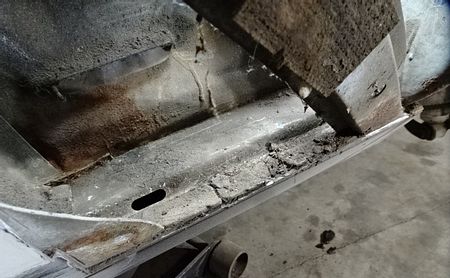  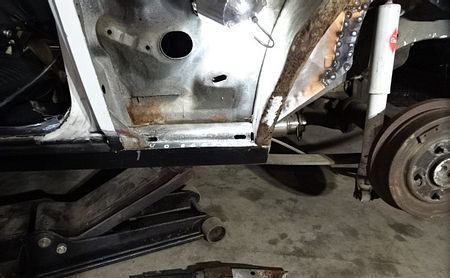  Then I cut out the forward section of the wheel house lip that was rusted and dented. 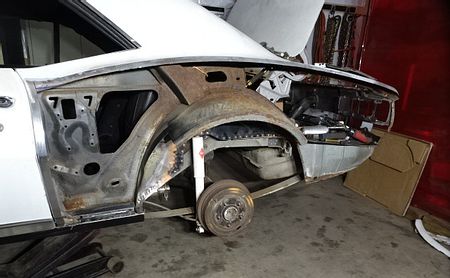  Did a bunch of cleaning and de-burring and set the new skin on for a test fit. It, actually, looks like it's going to be very close. 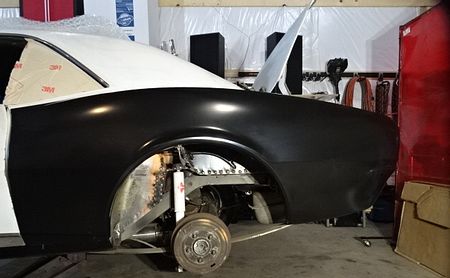  Marked the area of the outer house to cut out the sections I need. 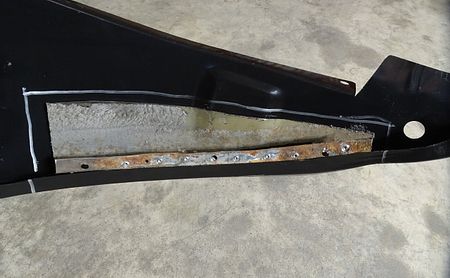 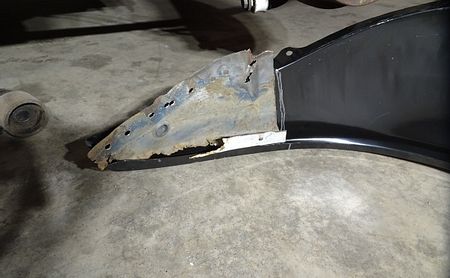 And that is where I am at today. Next work session is getting the sections cut out and start cutting the skin to fit.
__________________
Mitch 1970 Chevelle SS 1966 Chevelle SS 1967 Camaro ss/rs 1938 Business coupe, street rod 2000 FXSTS, original owner, 13k miles
|
|
#13
12-22-2020, 07:33 PM
|
|||
|
|||
|
Great work, thanks for sharing.
__________________
1967 Camaro RS/SS convertible Butternut yellow with black power top, factory AC Rebuilding 1967 RS headlight motors
|
| The Following User Says Thank You to 1crossram For This Useful Post: | ||
Too Many Projects (12-22-2020) | ||
|
#14
12-27-2020, 08:01 PM
|
||||
|
||||
|
Looking good!
__________________
Dave Dykstra 1968 Camaro Palomino Ivory/Ivy Gold interior -Delivered to Courtesy Chevrolet, Los Angeles, CA 2013 Corvette Grand Sport 60th Anniversary Edition Arctic White/Diamond Blue interior -Delivered to Bill Jacobs Chevrolet, Joliet, IL NCRS#66003 Speed dictates the severity of consequence-Tres Martin Dykstra Motorsports
|
| The Following User Says Thank You to dykstra For This Useful Post: | ||
Too Many Projects (12-28-2020) | ||
|
#15
12-28-2020, 03:35 AM
|
||||
|
||||
|
Quote:
Thanks, I've got about 10 hours into trimming and fitting the skin and just can't get it where I want it. It keeps rocking on what is left of the original wheel house. I wanted to retain that to locate the new skin, but the wheel opening on the skin seems a bit too high to get the body lines to line up. Guess I'll cut off the center section, align the skin and use the complete repro outer house after all. At least 3 hours of that has been spent on re-locating the weld flange at the rocker up 1/4" a little at a time with the dolly. I, finally, have the center of door body line down low enough to be right on.
__________________
Mitch 1970 Chevelle SS 1966 Chevelle SS 1967 Camaro ss/rs 1938 Business coupe, street rod 2000 FXSTS, original owner, 13k miles
|
|
#16
12-28-2020, 11:11 PM
|
||||
|
||||
|
All right, I was thinking I would need to cut off the rest of the outer house to get the new panel up 1/8", but figured I may as well beat on it first, to see if the skin would go up further and it DID !! I think it was pushed down slightly from the crease down the whole length of the original panel.
Finally, all the body lines are in alignment. 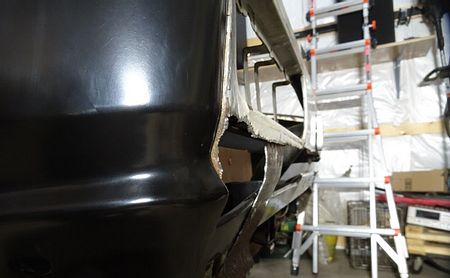 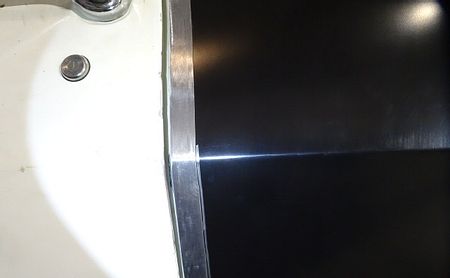 This bottom weld flange was a PITA. I had to keep moving it up with the hammer and dolly, but I got it.  The trunk drop even lines up now. 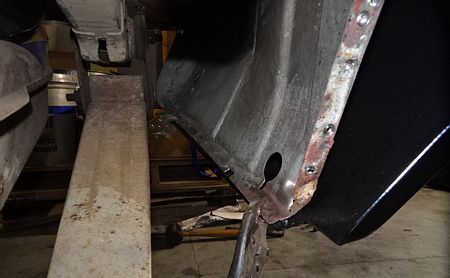 The new panel is inside the original, to retain the original body lines. It goes all the way to the top ridge. There is no seam visible in the trunk, unless you lay your head on the pan and look up. That, too, will get a thin swipe of seam sealer, to protect from moisture getting under it, but will help disguise it too.  The leading edge fits between the door jamb structure and the original q-p.  With the panel fitted, it was time to clean up the rust and be ready for the converter/encapsulator and then undercoating.  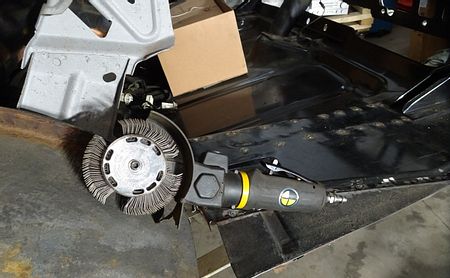  As long as I was already making a mess, I ground down the welds on the inner repair too. 
__________________
Mitch 1970 Chevelle SS 1966 Chevelle SS 1967 Camaro ss/rs 1938 Business coupe, street rod 2000 FXSTS, original owner, 13k miles
|
|
#17
12-29-2020, 01:51 AM
|
||||
|
||||
|
Looks great, nice work fitting the new panel. Are you lapping or butting the upper seam?
|
| The Following User Says Thank You to scuncio For This Useful Post: | ||
Too Many Projects (12-29-2020) | ||
|
#18
12-29-2020, 02:01 AM
|
||||
|
||||
|
Top and front will be lapped, new skin behind to minimize filler to blend.
Right side gets a full quarter. That will be interesting to remove and see what is left of the original under it.
__________________
Mitch 1970 Chevelle SS 1966 Chevelle SS 1967 Camaro ss/rs 1938 Business coupe, street rod 2000 FXSTS, original owner, 13k miles
|
| The Following User Says Thank You to Too Many Projects For This Useful Post: | ||
scuncio (12-29-2020) | ||
|
#19
12-30-2020, 11:20 PM
|
||||
|
||||
|
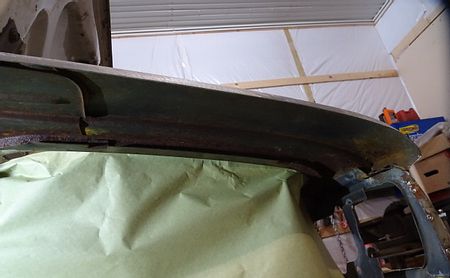
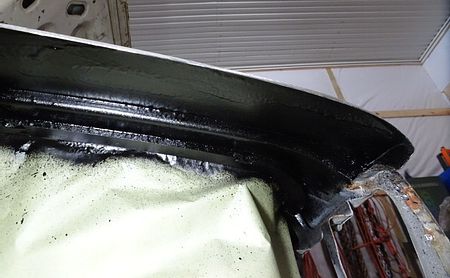
Prepping before quarter install. I cleaned up the loose rust and then shot it all with rust converter and then undercoating. First pic is supposed to show the rust, but not enough light.
__________________
Mitch 1970 Chevelle SS 1966 Chevelle SS 1967 Camaro ss/rs 1938 Business coupe, street rod 2000 FXSTS, original owner, 13k miles
|
|
#20
01-01-2021, 02:54 AM
|
||||
|
||||
|
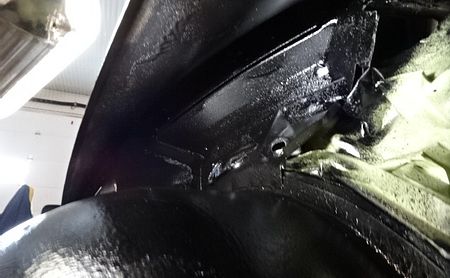
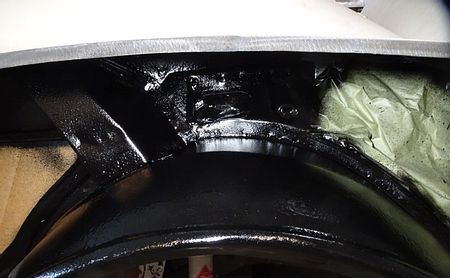
Still getting ready to install q-p. Today was clean up, weld holes shut and install the original trunk drop.
wire wheeled the rust on the inside for undercoating.   I cut thru this with the plasma while removing the tail panel. Also looks like the factory had the spot welder in the wrong place the first try. 5 dents and heated spots in line with the cut.  Used my copper backing plate on the cut. 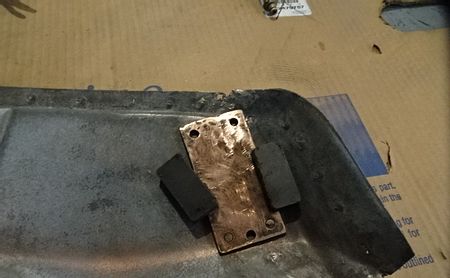 Went all the way around, welding spot drill depressions/holes for a solid surface for reuse. 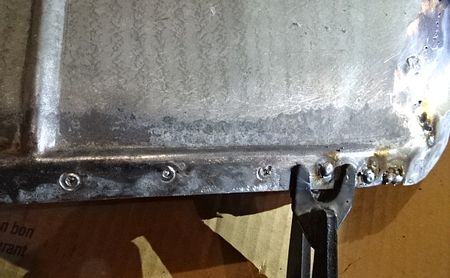 found the date stamp December 1966. Car was built second week of Feb. 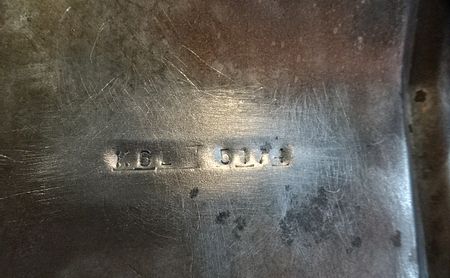 All welds knocked down. 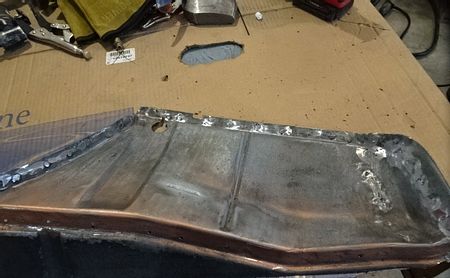 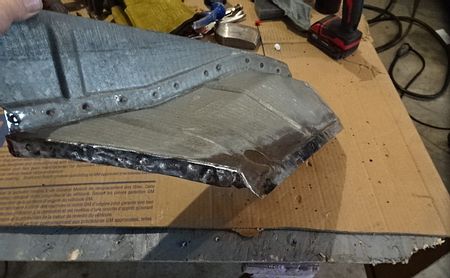 Shot it with undercoating before lunch.  That was dry when I came back, so welded it on. I knocked down the welds on it and the pan to frame rails, so I wasn't throwing grindings in the drop later. 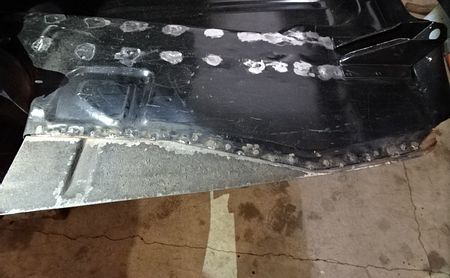
__________________
Mitch 1970 Chevelle SS 1966 Chevelle SS 1967 Camaro ss/rs 1938 Business coupe, street rod 2000 FXSTS, original owner, 13k miles
|
|
|
|


 Linear Mode

