
|
|
|
|||||||
| Register | Album Gallery | Thread Gallery | FAQ | Community | Calendar | Become a Paid Member | Today's Posts | Search |


|
|
|
Thread Tools | Display Modes |
|
#21
 02-05-2021, 12:15 AM
|
|||
|
|||
|
Thanks Freddie that is probably why. I think Rat motor cars the motor is over somewhat to passenger side?
I’ve done 5-6? Cars over the last 30? years all SB, 2-67,s, 2-68,s and a real 69 Z @ friend owned. All of them had to have the small slot and we also used a BFH to massage tunnel side. We actually saved the pieces removed and I gas welded them back in the Z when he wanted it stock again . 
|
|
#22
02-05-2021, 12:54 AM
|
||||
|
||||
|
Thanks for all that Mike. Helps me a bunch and also helps others to understand the differences of a bunch of these shifters. I knew you had a ton of experience with 4-speeds, most of the shifters, and all the Muncie transmissions. I was hoping that you might chime in and contribute some knowledge to this thread so again...thanks.
 I got a new carpet in today and will now wait for the shifter to arrive. I knew the straight rods might require a cut and was hoping to massage the tunnel alongside the rods. I'll mock it up and cut the shifter hole, then massage the tunnel using a block of wood and a bottle jack to get the lateral stretch needed for the rods. Hoping to gain the clearance so that I don't have to cut the side.
__________________
I like solid lifter cars, big cams and cars w/ 3 pedals in them. 
|
|
#23
02-05-2021, 01:47 AM
|
|||
|
|||
|
Your welcome Graeme.
You may be able to sneak the trans x member over 1/4” or so to passenger side which may help. Try pushing trans over with no mount bolts in and see what u can get away with before modifying.
|
| The Following User Says Thank You to rszmjt For This Useful Post: | ||
NorCam (02-05-2021) | ||
|
#24
02-19-2021, 10:29 AM
|
|||
|
|||
|
Nice pics , which design is the bottom left bracket ? I believe that’s the one I have & doesn’t have the red handle .... Is there a date code on the body ? It has the rods with tubing & steel bushings .It was in a 67 Camaro, Modified Production car that started racing in the early 70’s. It’s installed in my 66 Chevy II & the tunnel had to be split front to back & opened for the rods to clear ...
|
|
#25
02-19-2021, 01:52 PM
|
|||
|
|||
|
Bottom left Bracket in pictures is Super Shifter 2 as far as I know, it was used for many years, usually shifter body will say Super Shifter on it and have the push down feature with the small coil type spring at front under neath of shifter body. Don’t know how the dating transposes on late model hurst body’s.
Only the Super Shifter 1 used the flat plate bracket and 3 thick wall tube spacers, and the shifter body was conventional H pattern and just said Hurst Competion Plus on the body.
|
|
#26
02-19-2021, 02:12 PM
|
||||
|
||||
|
Install - Part 1
Figured I should add to this thread now that I have found a couple of shifters and have made the cuts to the floor of the 69 Camaro. In the past couple of years, I have asked about the cuts needed to install a day 2 shifter, and the general consensus from those who have done it was...you're going to need to hack the hell out of the tunnel. Well, that wasn't far off. I ended up finding a couple of period-correct shifters which led to the project getting underway. The first was a used Super Shifter 3 that I used to mark up the holes for the floor cuts, and the second was a purchase I made a week later when I found a NOS Super Shifter 3 that was still in the box. Being that both have the H/D straight-armed shift rods that bolt-on at each end, I suspect each are early model designs from the late '70s to early '80s. Here are a few pictures of the NOS one before I get into the install.  Notice the high position offset mount (left) and the H/D straight-armed shift rods and tabs on the right. 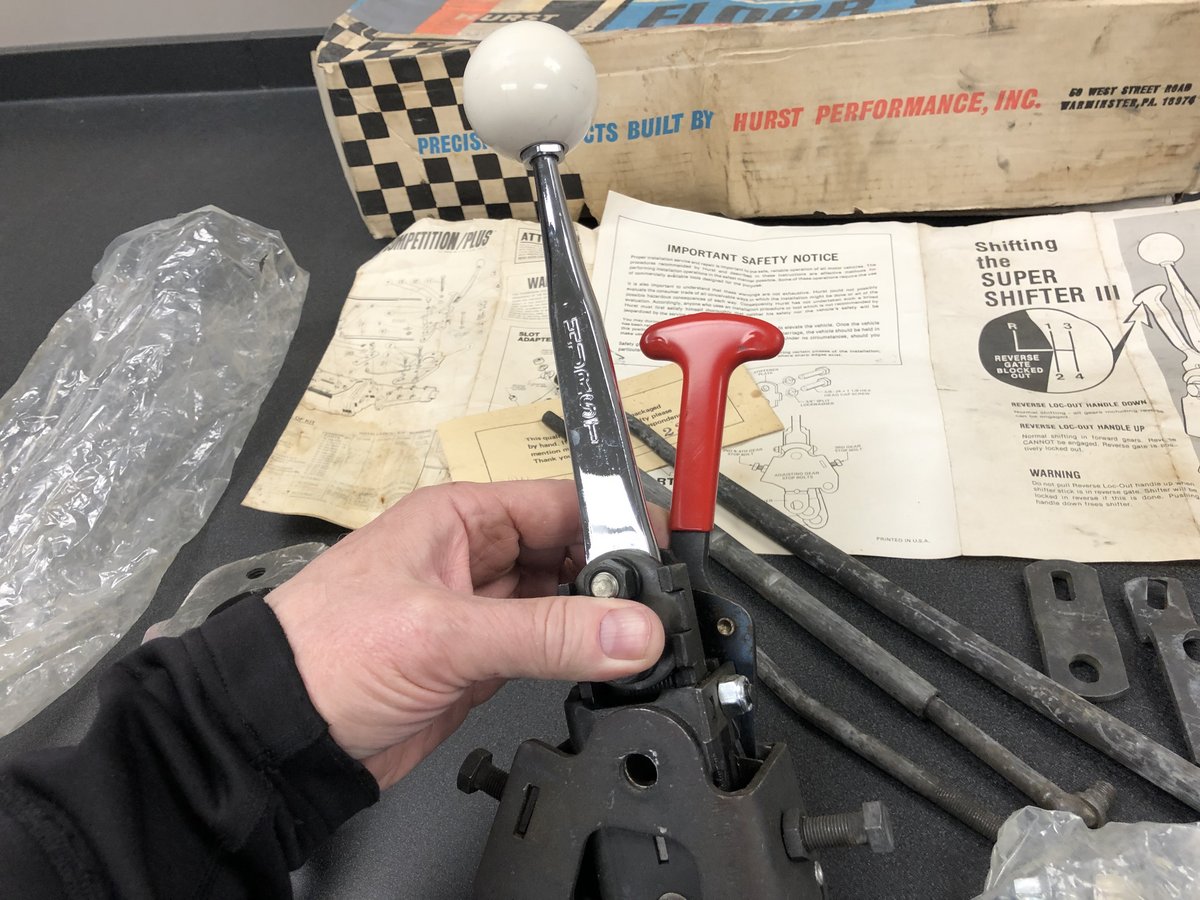 The rods are threaded on each end and fasten with steel bushings, fold over locking tabs, and nylon locknuts. 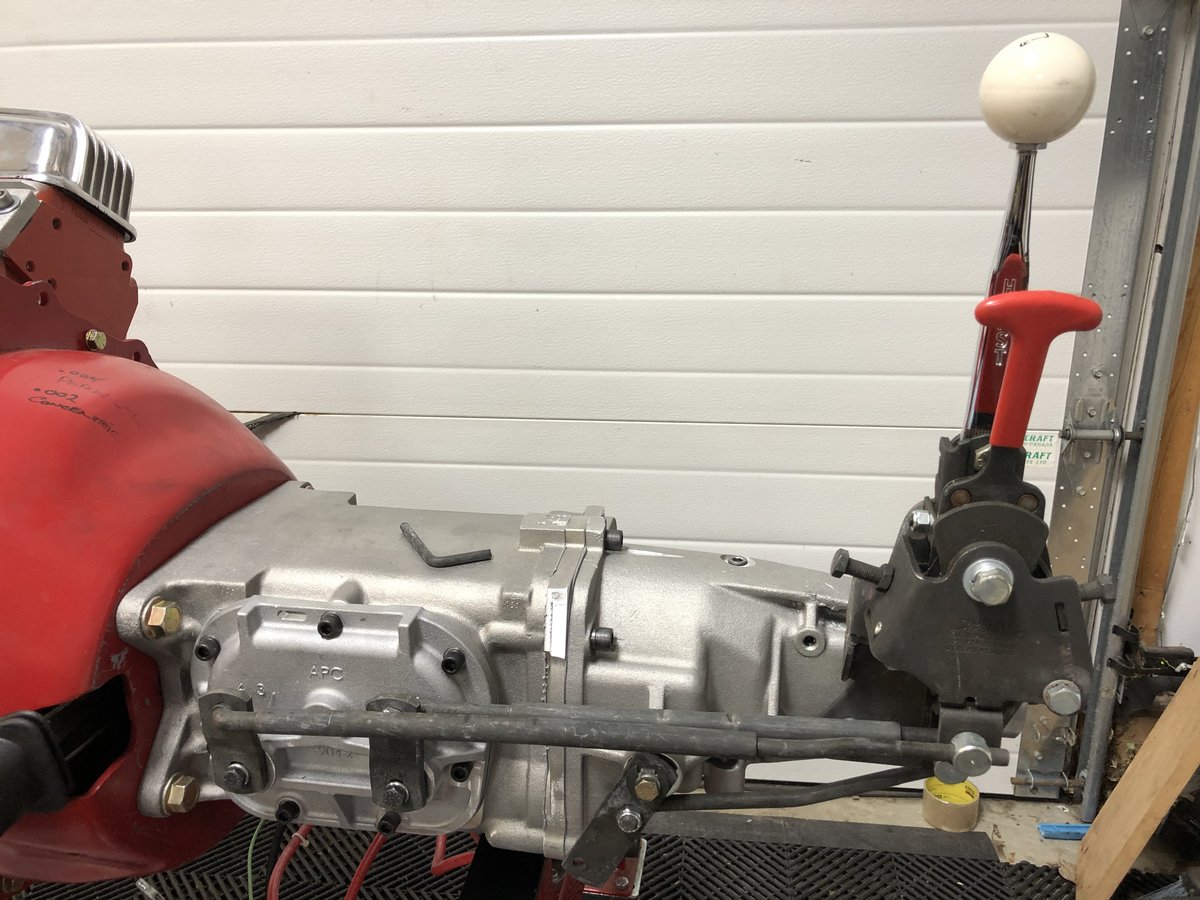 When set up and adjusted, you quickly get a sense of feel for how heavy duty these shifters are. You can really bang gears with these.
__________________
I like solid lifter cars, big cams and cars w/ 3 pedals in them.
|
| The Following User Says Thank You to NorCam For This Useful Post: | ||
Rumbleguts396 (02-19-2021) | ||
|
#27
02-19-2021, 03:17 PM
|
|||
|
|||
|
Graeme, 1 trick we used to do with the adjustment of the rods- once u get the alignment pin to fit we would lengthen the 3-4 adjuster 1 turn. This kind of makes the H patten more pronounced going towards 3 rd gear . This makes the shifter lower internal arms go through a stretched or distorted H pattern favouring it towards 3rd gear, this way when you are slamming gears it does not go through the exact H pattern . It does not effect the neutral position and does not cause binding when just cruising.
|
|
#28
02-19-2021, 03:29 PM
|
||||
|
||||
|
Quote:
__________________
Frank Szymkowski 1971 Torino 351c 4v GT convertible. White/white with black,4 speed, shaker, am/fm, ps/pdb, buckets/console, ac, flip headlights 1969 GTO Judge Warwick blue/blue, RAIII, 4 speed, tach/gauges, safe t track, flip headlights, 3.55's, ps and radio.
|
|
#29
02-19-2021, 03:45 PM
|
||||
|
||||
|
Install - Part II
OK...so not having any real experience with installing one of these but knowing I'm going to have to cut the tunnel, I got started by measuring the shifter in relation to the tail housing and took note of some measurements on the shifter body and the mount. The first thing you need to realize is that these shifters (Hurst SS3 or RamRod) use this redesigned offset tail housing mount which raises the shifter body up by some 4" and offsets it a further 1.25" to the driver's side. (I believe this mount was modified in the mid to late 70s when the revisions were made to the super shifter to include the red lockout handle). Next, I marked the tail housing and installed the motor and transmission so that I could mock things up in the car and transfer the measurements over to the floor. Now the cutting begins. 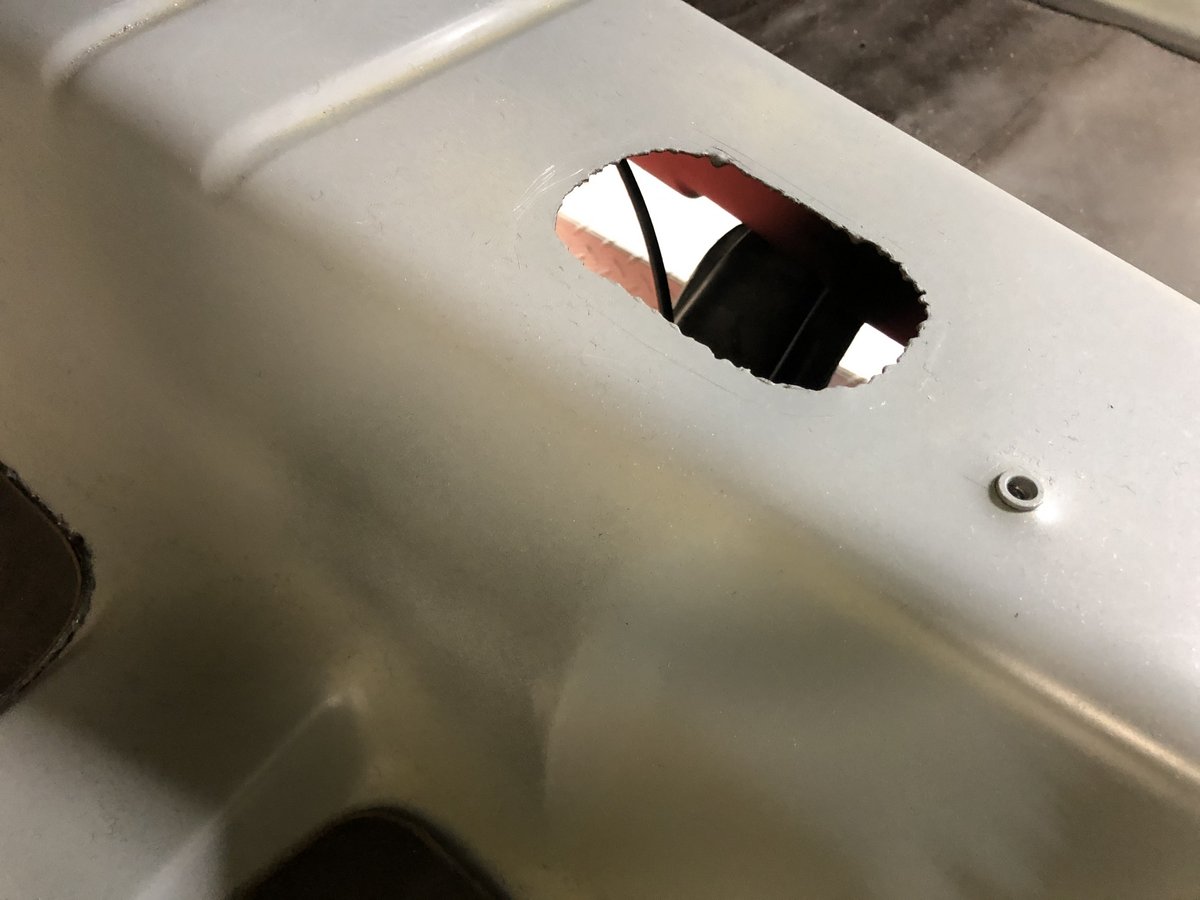 Virgin floor before the cuts. Factory style hole is atop the tunnel. 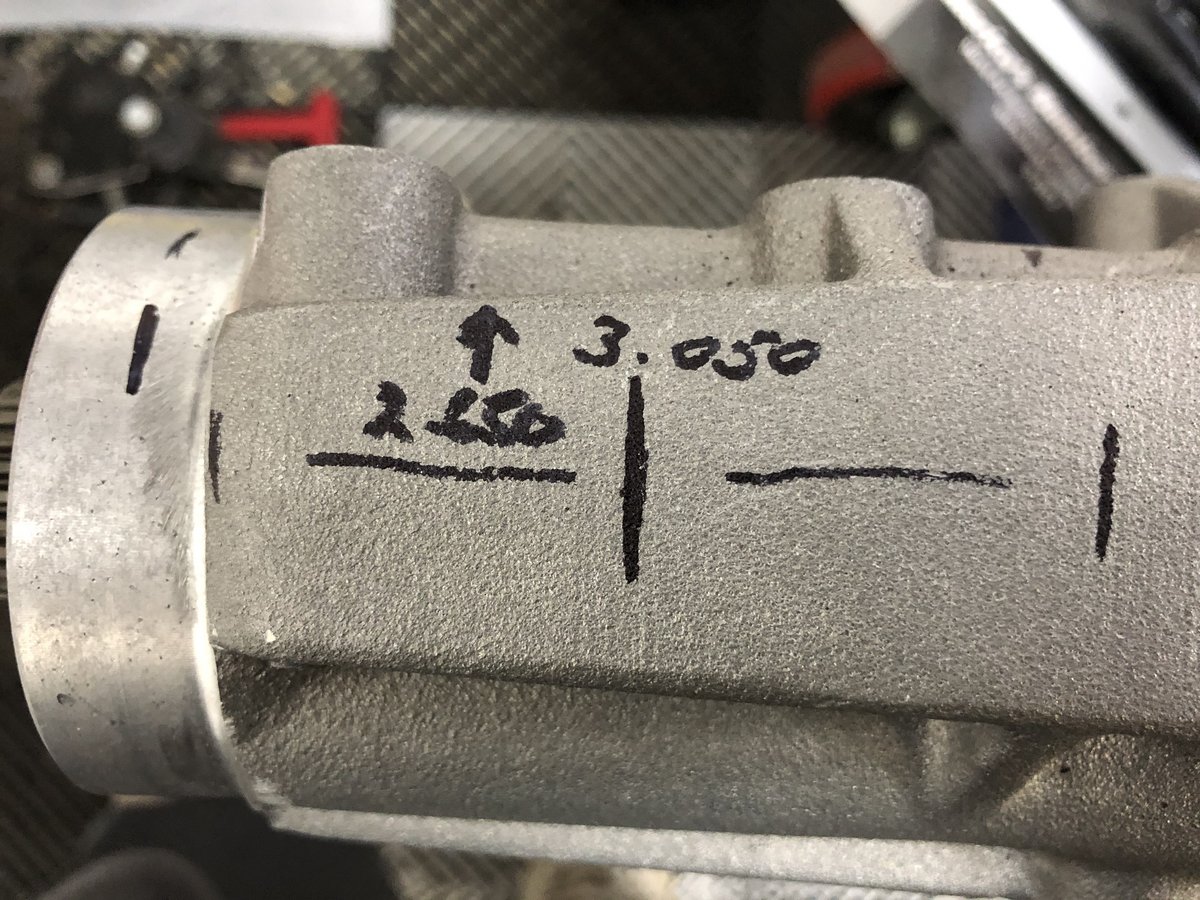 Making note of the shifter body width and the width of the mount, I marked the tail for what was needed.  This shows the offset of the SS3 Shifter Mount Bracket. It's considered a High Mounting Position and will raise the shifter up through the floor.  After installing the trans, I transferred the measurements to the underside of the tunnel. The initial hole was 4.750 wide x 8" tall. 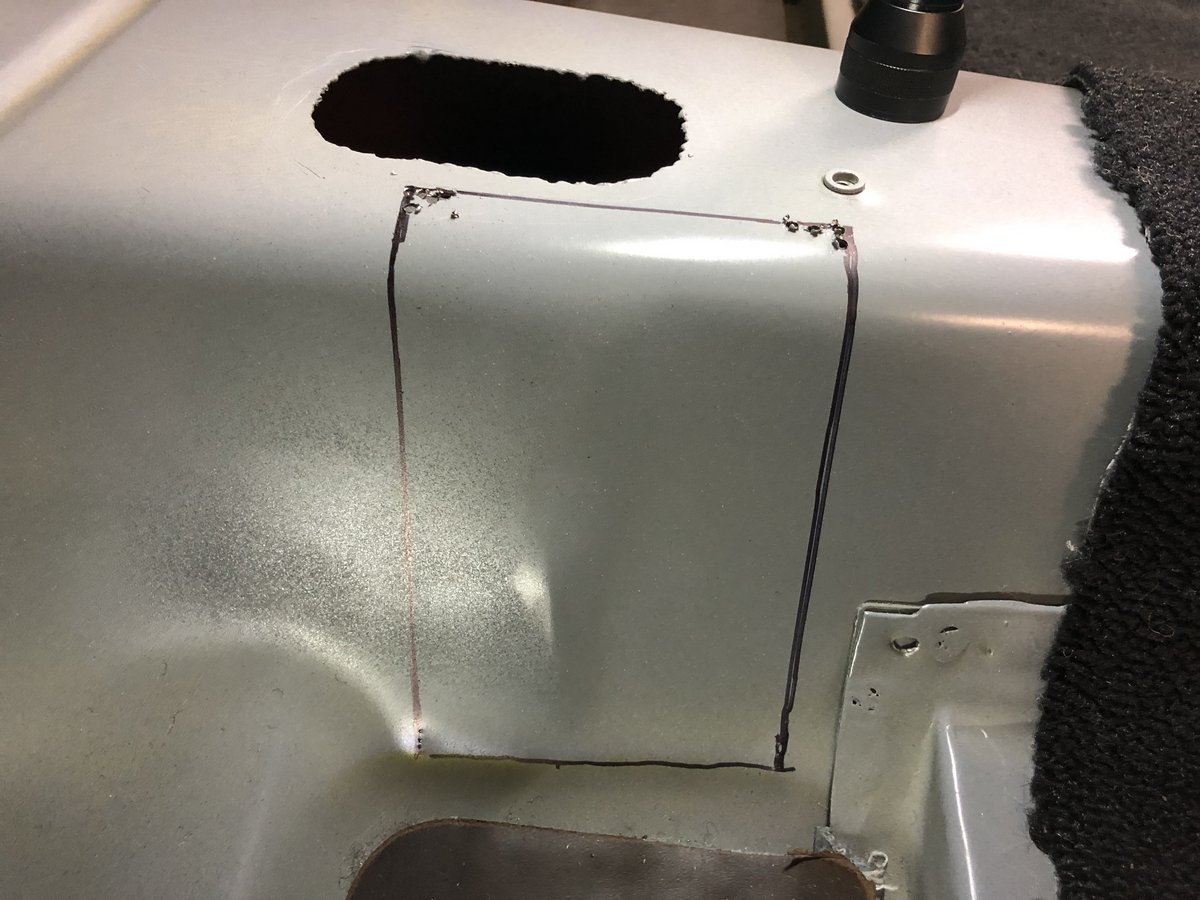 I drilled a couple of pilot holes for the jigsaw blade and got ready to cut the opening downwards. 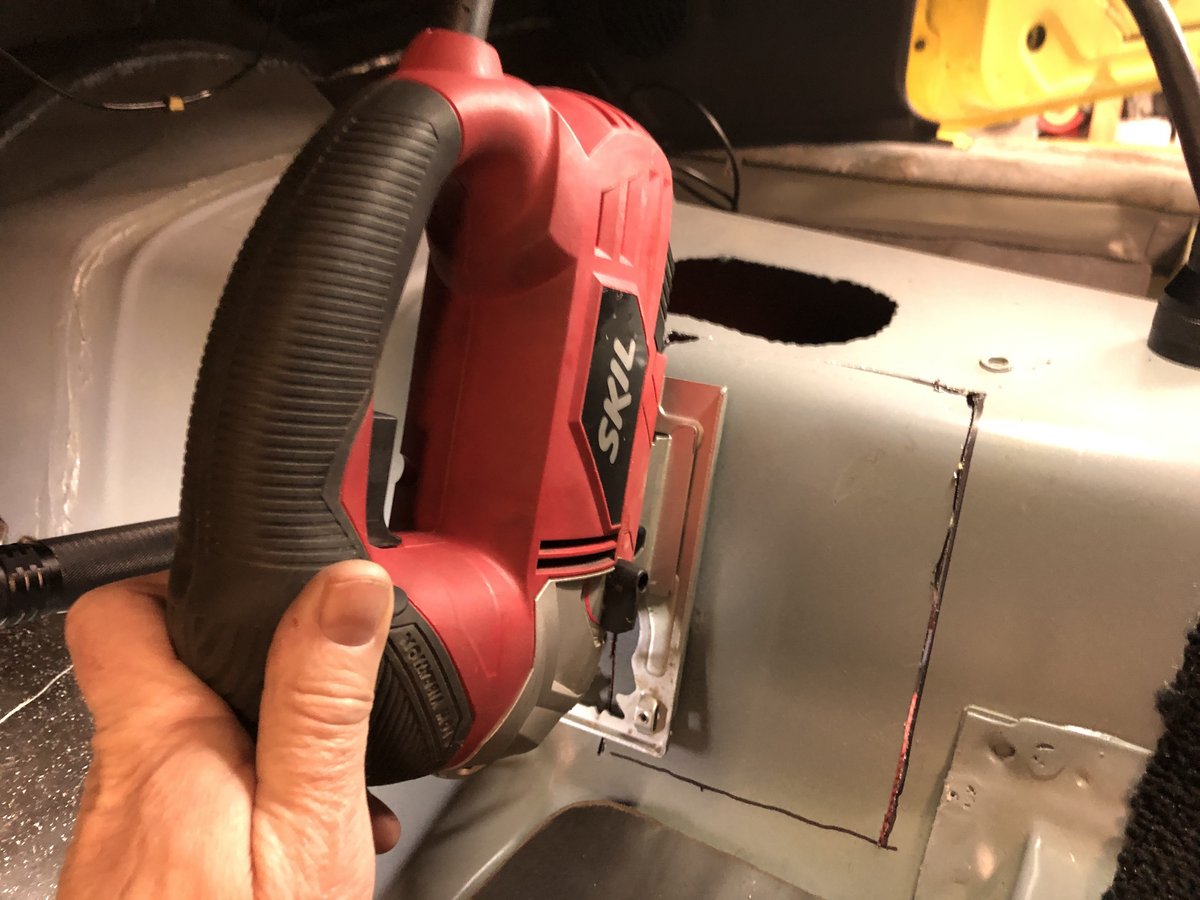 First I cut across the top and then went down each side to create a hinge at the bottom.  I wanted to leave the hinge intact and possibly use this to enclose the shifter body by closing in the sides after it was pushed out.  It gave me enough of an opening but did little to provide an area where a new boot could be properly installed topside.  This idea can be used, but the boot would need to fold down the side of the tunnel. Not exactly to my liking. To be continued...
__________________
I like solid lifter cars, big cams and cars w/ 3 pedals in them.
Last edited by NorCam; 02-19-2021 at 04:27 PM.
|
|
#30
02-19-2021, 05:22 PM
|
||||
|
||||
|
Install - Part III
After making the first few cuts, I later decided that the opening needed to be enclosed better, I did some more trimming and immediately remembered what people had told me. "Your gonna have to chop and hack out the side of that tunnel to get it all to fit". Yeah OK...you told me so.  Now, let me preface this next section by first telling you I'm not an experienced welder. On top of that, I broke my mask and was pretty sure there was little to no mig gas left in my bottle. Now...my metal forming skills aren't too bad so I figured it'd be best to cut the opening clean and remove the hinged panel. My plan was to then mount the shifter body and see what would be needed to enclose the body with a sheet metal box, and do so while not making it too big so that it impedes the travel of the bucket seat. I figured if I could enclose it with a decent box, I could provide enough of a top that a customized boot could be fabbed on a smaller base, and that way I'd have a smaller upright boot to wrap around the shifter. I ended up fabbing some thin sheet metal to close in 3 sides and encase the shifter body. I then got ready to stab it with blind welds since I had no mask. Yup...the tank was also running empty so in addition to a few holes being burned through on the thin 24ga metal, there were a few less than ideal welds on my part (lol). Being persistent, I got some decent spot welds to penetrate everything nicely and it was enough to hold it all together. I got it to fit the body of the shifter and then moved onto the shift rods which would need slotted.  Here is an end piece I hammered and dollied out of 24ga metal to form it up along the side of the tunnel.  I did the same for the left side and then cut a filler piece to weld between the two sides. All in all, I was happy with it. 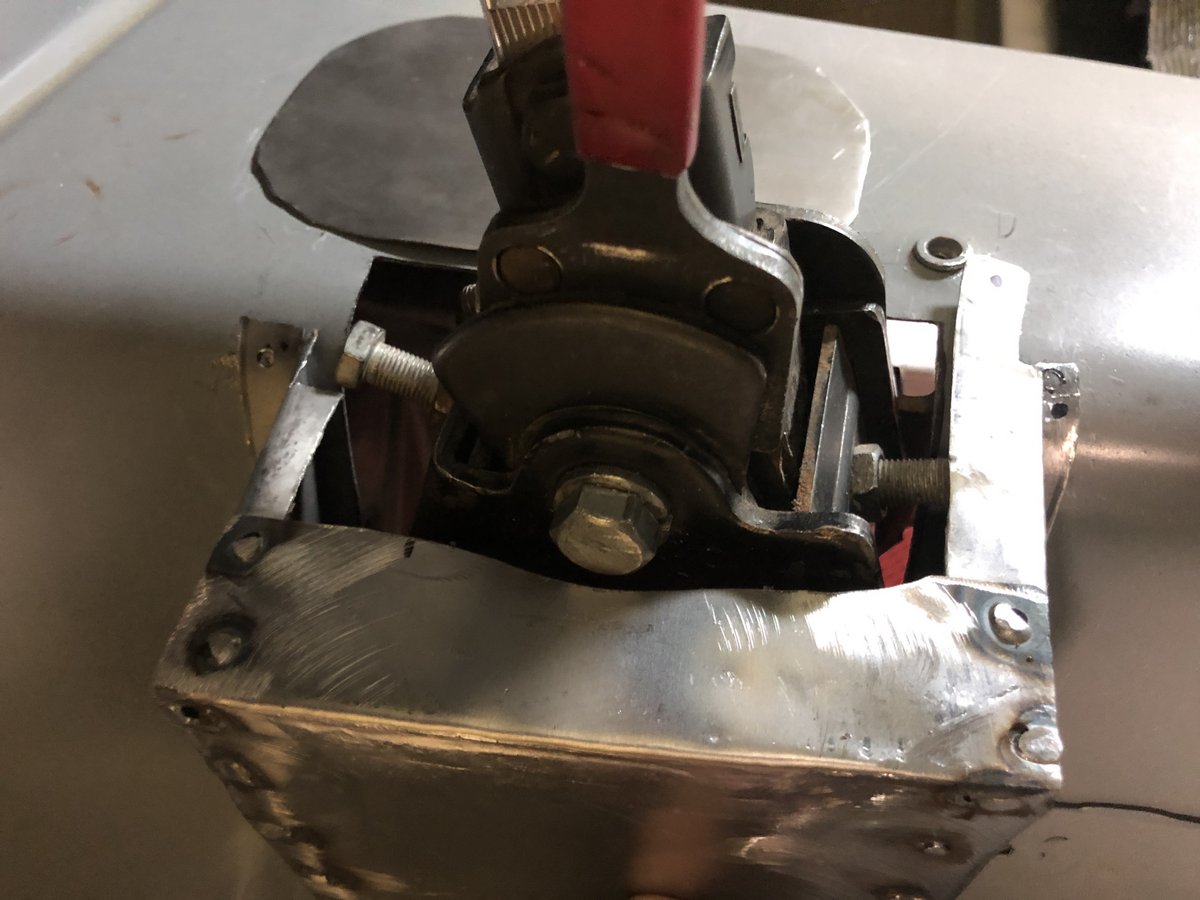 The issue with the box was the interference with the shift stop bolts on the case. It means all adjustments will have to be done on mock-up before the transmission is installed.  Here is the box after it was primed with the front cover already roughed together for the shift rod slotting.
__________________
I like solid lifter cars, big cams and cars w/ 3 pedals in them.
|
|
|
|


 Linear Mode

