
|
|
|
|||||||
| Register | Album Gallery | Thread Gallery | FAQ | Community | Calendar | Become a Paid Member | Today's Posts | Search |


|
|
|
Thread Tools | Display Modes |
|
#21
 08-01-2021, 12:35 AM
|
||||
|
||||
|
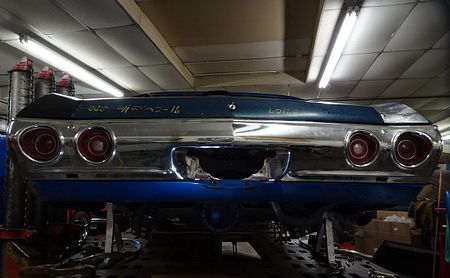
I have made more progress over the past couple weeks. After the door pillar and roof seam were where they needed to be, I finished welding the window channel and flange to the extension panel in the trunk.
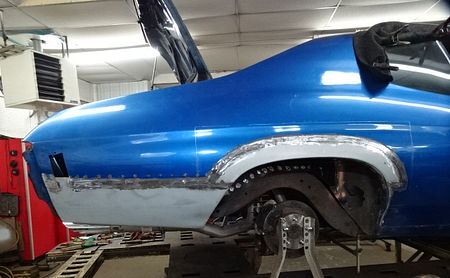
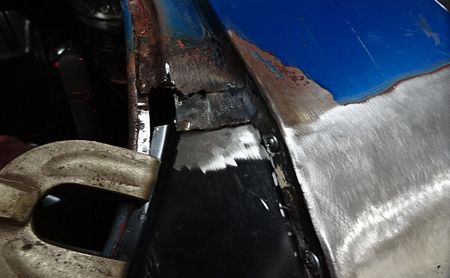
  Then final fit, prep and install of the trunk extension to lower quarter. 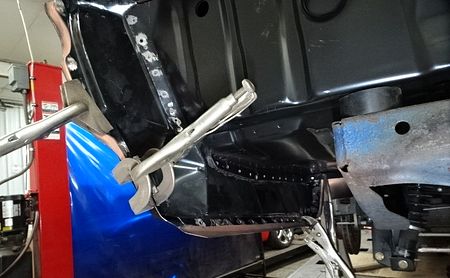 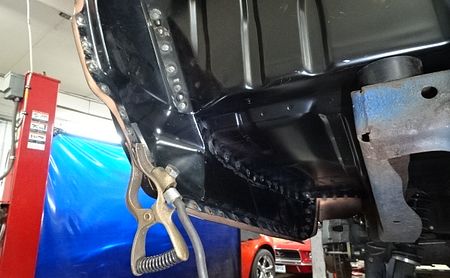 Then the messy piece, welding the outer wheel house section and grinding. Lots of spatter while in the wheel house to weld and covered in grinding grit while cleaning up the welds.  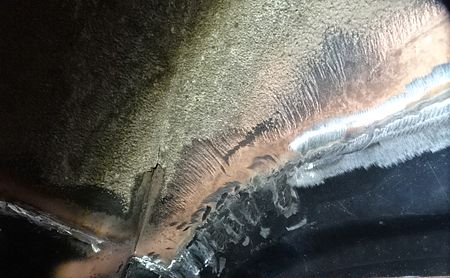 At this point, the entire left side of the car has been rebuilt from the damage...  I then started on repairing rust on the right side. I cut out the wheel arch of the quarter and the inner wheel house. 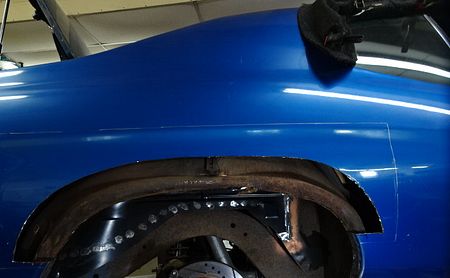  I got patch panels for the arch and rear quarter and cut out what I needed for the arch and attached with drill screws to prevent it from moving during welding. 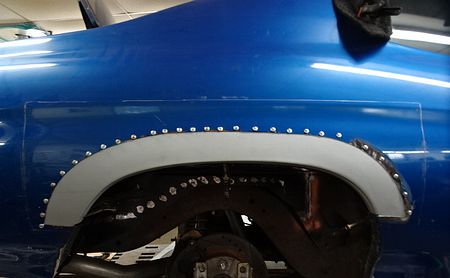 Not the best pic, but the screws pull the 2 panels together tightly to keep the skim coat of filler to blend as thin as possible.   I had 3 layers where the 2 patches met with the quarter, so I cut the arch patch 2.5 inches up from there for a butt weld to remove that layer and keep it uniform at 2.  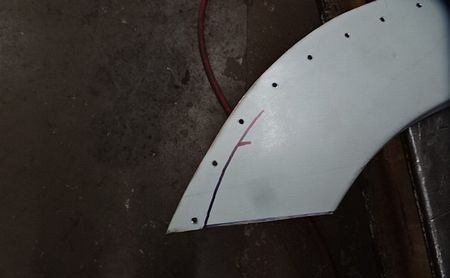  Very pleased that I was able to pull the patches tight enough to keep the gap tight in the trunk too. ALL the gaps are much tighter than the original panels were. I will cover the seams with a skim of seam sealer and once the trunk is sprayed with proper textured paint, the seams should hide nicely.  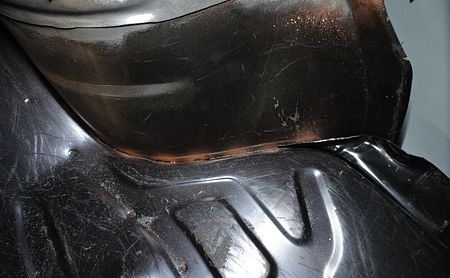
__________________
Mitch 1970 Chevelle SS 1966 Chevelle SS 1967 Camaro ss/rs 1938 Business coupe, street rod 2000 FXSTS, original owner, 13k miles 
|
| The Following 12 Users Say Thank You to Too Many Projects For This Useful Post: | ||
1967Z28 (08-02-2021), big gear head (08-01-2021), Bill Pritchard (08-01-2021), Billohio (08-15-2021), Dave Rifkin (08-01-2021), dykstra (08-02-2021), m22mike (08-01-2021), mhurd (08-01-2021), Oldss (08-01-2021), olredalert (08-01-2021), ruralrte66 (08-02-2021), scuncio (08-13-2021) | ||
|
#22
08-02-2021, 12:59 PM
|
||||
|
||||
|
Lookin good Mitch!
__________________
Dave Dykstra 1968 Camaro Palomino Ivory/Ivy Gold interior -Delivered to Courtesy Chevrolet, Los Angeles, CA 2013 Corvette Grand Sport 60th Anniversary -Delivered to Bill Jacobs Chevrolet, Joliet, IL NCRS#66003 Education is what you get when you read the fine print. Experience is what you get if you dont.-Pete Seeger Dykstra Motorsports
|
| The Following User Says Thank You to dykstra For This Useful Post: | ||
Too Many Projects (08-02-2021) | ||
|
#23
08-02-2021, 02:48 PM
|
||||
|
||||
|
Mitch has the itch.

|
| The Following User Says Thank You to Mr70 For This Useful Post: | ||
Too Many Projects (08-02-2021) | ||
|
#24
08-13-2021, 03:06 PM
|
|||
|
|||
|
Wow! to think of all this fun I've never tried- Y'all are artists that do this stuff and glad i don"t live in rust belt anymore. Great work Mitch!
__________________
69 RS/Z 302 VE3 Daytona 69 Chevelle SS 396 375 69 T/A clone LS6/6 speed 90 Formula 350
|
|
#25
08-13-2021, 03:33 PM
|
|||
|
|||
|
X2!!!!
Gregg
|
|
#26
08-17-2021, 12:33 PM
|
||||
|
||||
|
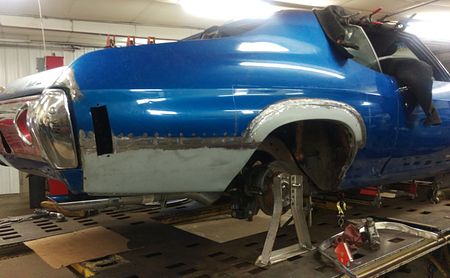
Work has continued, just slaking on posting. The right side patches are all welded in.
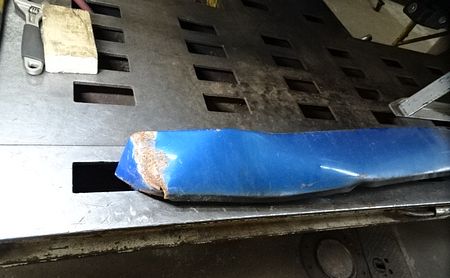
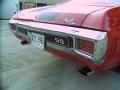
 Needed to make a patch for the rust at the valance mount.  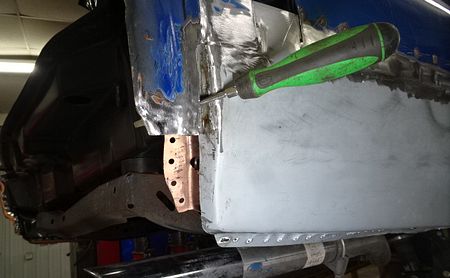 Cut that from the excess wheel arch panel.   Next was to deal with the bumper fit. The quarter was installed too low at the rear, and the corner sat right on the bumper, while the body line at the trunk lid was level. The corner was 3/8" too low, so I cut the back corner of the quarter off. I needed to move it up on the outside and keep the body lines as aligned as possible. That necessitated cutting the corner into 3 pieces.  I had to weld in a sleeve here to fill the gap left by moving the left side down so the body line was flat. 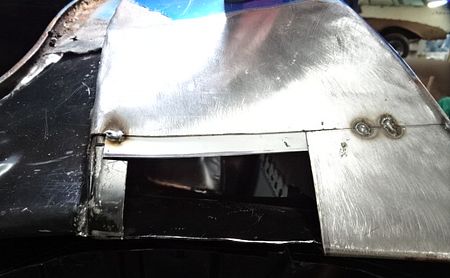 First 2 pieces of the pizza welded in. 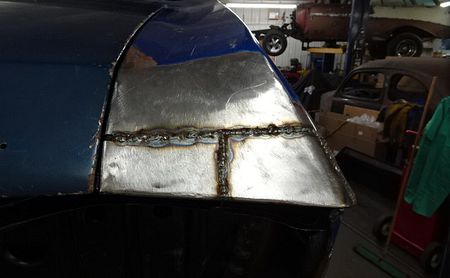  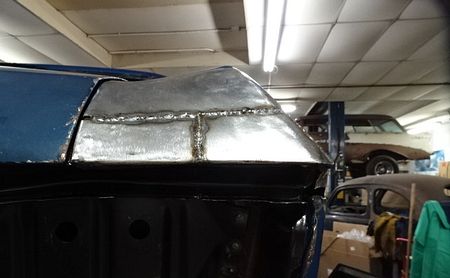 Body/paint guy has something to do now...  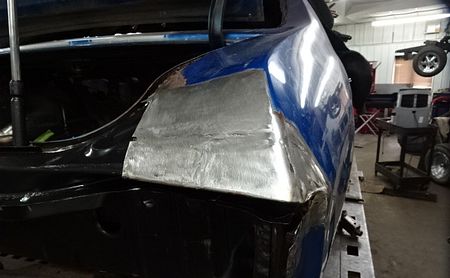 Refit of the bumper and I have a fairly straight line across the back and an even gap to the left side. 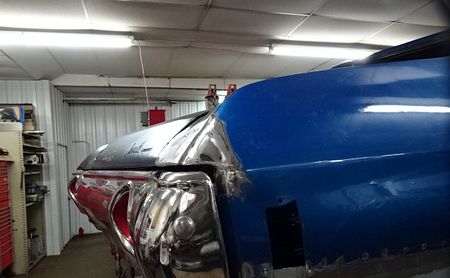 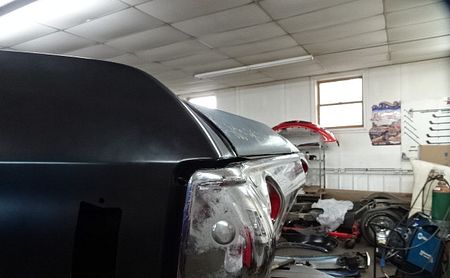 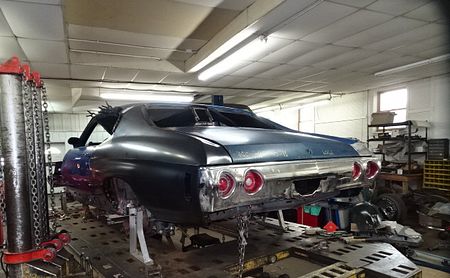  It isn't perfect, but it's a lot better than what I started from...  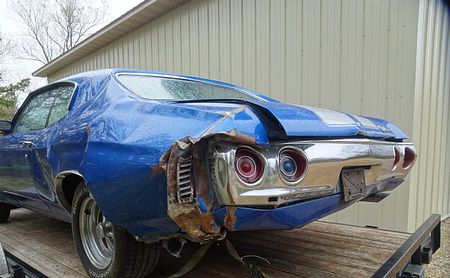
__________________
Mitch 1970 Chevelle SS 1966 Chevelle SS 1967 Camaro ss/rs 1938 Business coupe, street rod 2000 FXSTS, original owner, 13k miles
|
| The Following 14 Users Say Thank You to Too Many Projects For This Useful Post: | ||
big gear head (08-17-2021), Bill Pritchard (08-17-2021), Dave Rifkin (08-17-2021), DaveC68 (08-23-2021), dykstra (08-18-2021), Jonesy (08-17-2021), L16pilot (08-18-2021), mhurd (08-17-2021), Oldss (08-17-2021), olredalert (08-17-2021), PeteLeathersac (08-25-2021), RPOLS3 (08-17-2021), SuperNovaSS (08-17-2021), Xplantdad (08-24-2021) | ||
|
#27
08-24-2021, 10:43 PM
|
||||
|
||||
|
Moved on to the last rust repair on the right side. Quarter was rusted thru at the tail panel.
  Cut the seal gutter from a donor piece left over from a late model Malibu we had in the front shop...  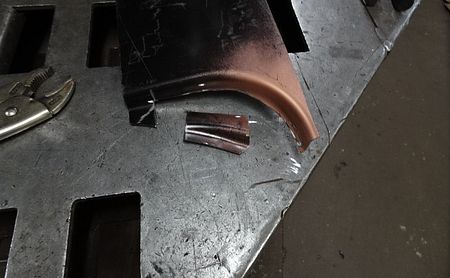 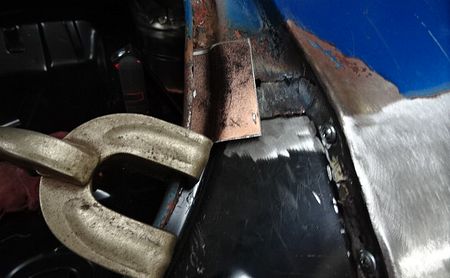 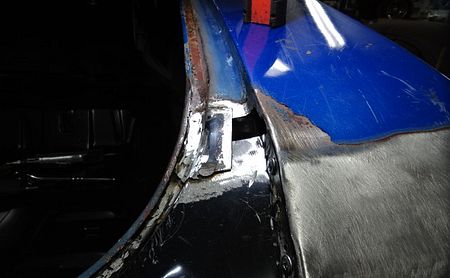 Second piece was from a left over piece from another project. 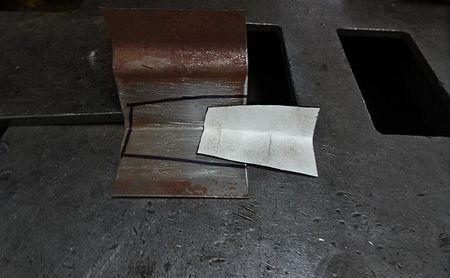 I used the shrinker jaws to give it the correct radius to match the car.   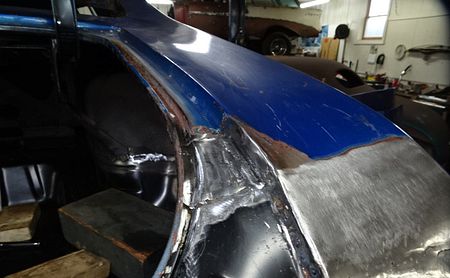 Back to the left side to install the gutter channel. The quarter to tail panel had a big difference in opinion of fit.  I cut out the excess and welded it back together and then down to the tail panel. 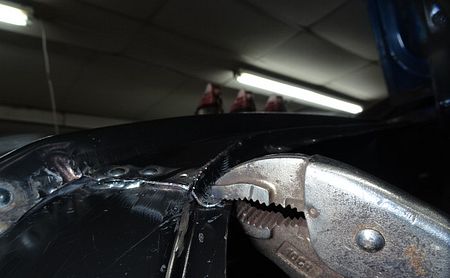 Then it was time to install the gutter. This is the same piece that was attached to the original quarter. I ran it thru the blaster cabinet and then spent some time untwisting and bending it back to the original shape to fit. It came out really nice. 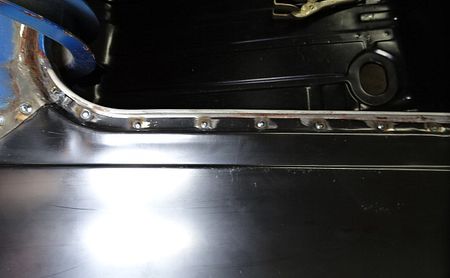 
__________________
Mitch 1970 Chevelle SS 1966 Chevelle SS 1967 Camaro ss/rs 1938 Business coupe, street rod 2000 FXSTS, original owner, 13k miles
|
|
#28
08-25-2021, 12:07 AM
|
|||
|
|||
|
Damn, your good !!!
__________________
70 Chevelle Vert L34 M21 28-A 791 70 Chevelle Cpe LS6 M40 14-14 756 70 Chevelle Cpe L?? M?? 926-99616 755 69 Chevelle Cpe L78 M21 71-B 756 70 Chevelle Cpe L34 M20 48-48 796 70 Chevelle Cpe L34 M40 75-75 788 70 El Camino L34 M20 28-C 765
|
| The Following User Says Thank You to BLACKLS5 For This Useful Post: | ||
Too Many Projects (08-25-2021) | ||
|
#29
08-25-2021, 12:26 AM
|
||||
|
||||
|
I couldn't find a lower valance I could get in less than a couple months, so performed surgery on the damaged one.
 After I did some twisting, pounding and welding of the tears, I had it pretty good, but the weld nuts were broken off both ends. I had a couple left over from a '47 ford project. I had to grind the raised locator off to be flat for this, but they worked well.   Not bad for a mangle part.  The right side has issues of it's own under a thick coat of filler. I'll let the bodyman deal with that... 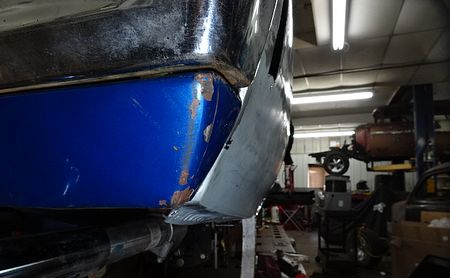 Onto the last details. I used the cut off panel as a template to mark the cut line, cut it out and test fitted the marker. It even works...    Located the position of the trunk latch and welded that in. I had to make a major depression in the trunk pan for this, as the latch is not the same on both sides and the mount area didn't have a provision for this. It's just metal, I can bend it. 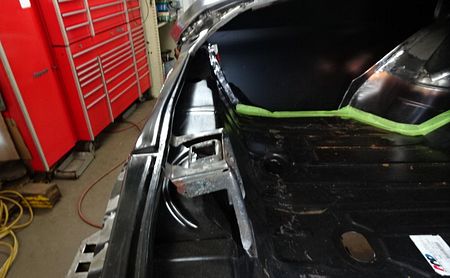 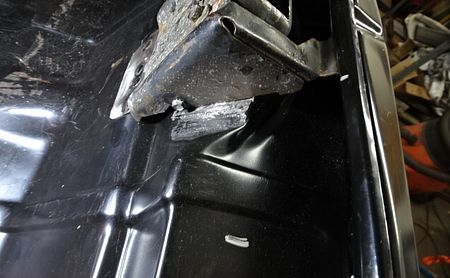 And the LAST piece of the puzzle....I took the lock from the old deck lid and installed it. Amazingly, the trunk shuts, locks and opens again. 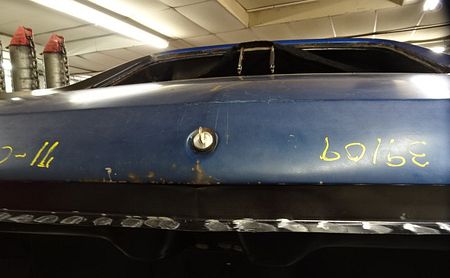
__________________
Mitch 1970 Chevelle SS 1966 Chevelle SS 1967 Camaro ss/rs 1938 Business coupe, street rod 2000 FXSTS, original owner, 13k miles
|
|
#30
08-25-2021, 12:51 AM
|
||||
|
||||
|
And that concludes the rebuild of the back half...
    I broke down all the holding clamps and removed the gauges to put my roller wheels on to turn it around and do the final tweaking and fitting of the front sheet metal.  
__________________
Mitch 1970 Chevelle SS 1966 Chevelle SS 1967 Camaro ss/rs 1938 Business coupe, street rod 2000 FXSTS, original owner, 13k miles
|
| The Following User Says Thank You to Too Many Projects For This Useful Post: | ||
Xplantdad (08-26-2021) | ||
|
|
|


 Linear Mode

