When I was planning this car, one thing I wanted to try and stay away from was a traction bar on the rear springs. In another life, I was a Direct Connection dealer (remember them?). It occurred to me I could use a Chrysler Super Stock Spring on the back and not use a traction device. Essentially, that's what many of the FAST guys do with they stock appearing cars. Trouble is, you can't easily adpat a Chrysler SS spring to a Chevy. Fortunately, AFCO offers a pretty good replica of the spring for circle track applications. I bought a pair. Here's a look:
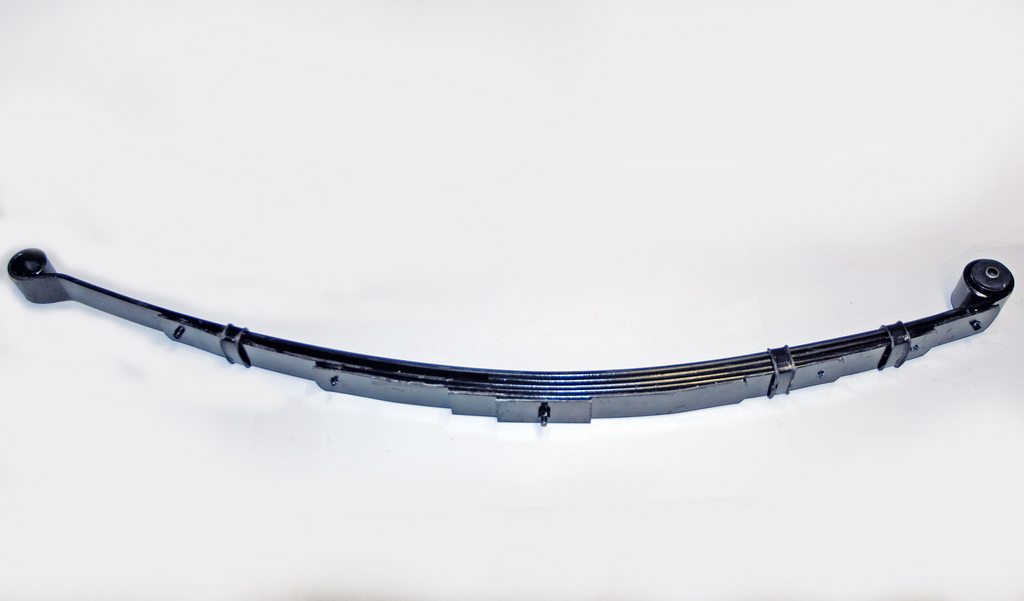
This is the basic spring:
The front segment is heavily biased, with more full and partial leafs in the spring pack:

Meanwhile, the rear has few:

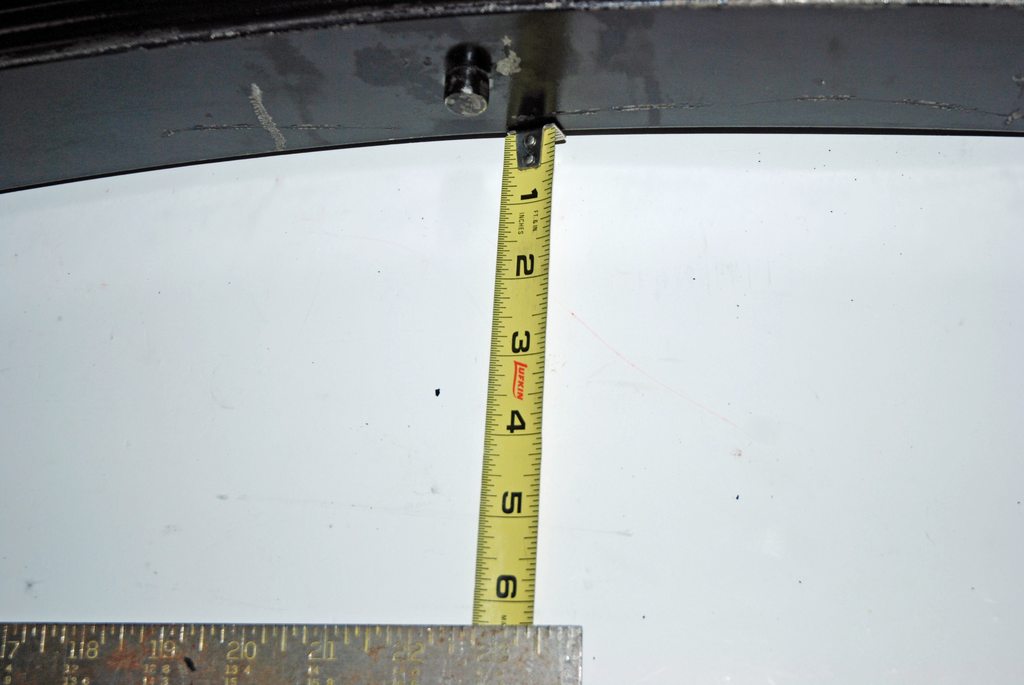
This is the arch of the out-of-the-box spring (which happens to be just about right for my Nova):
So how do they work? Simple. When under heavy acceleration load, a typical leaf spring will bend in the front segment. That's why you get wheel hop. This doesn't happen with an SS spring like this.
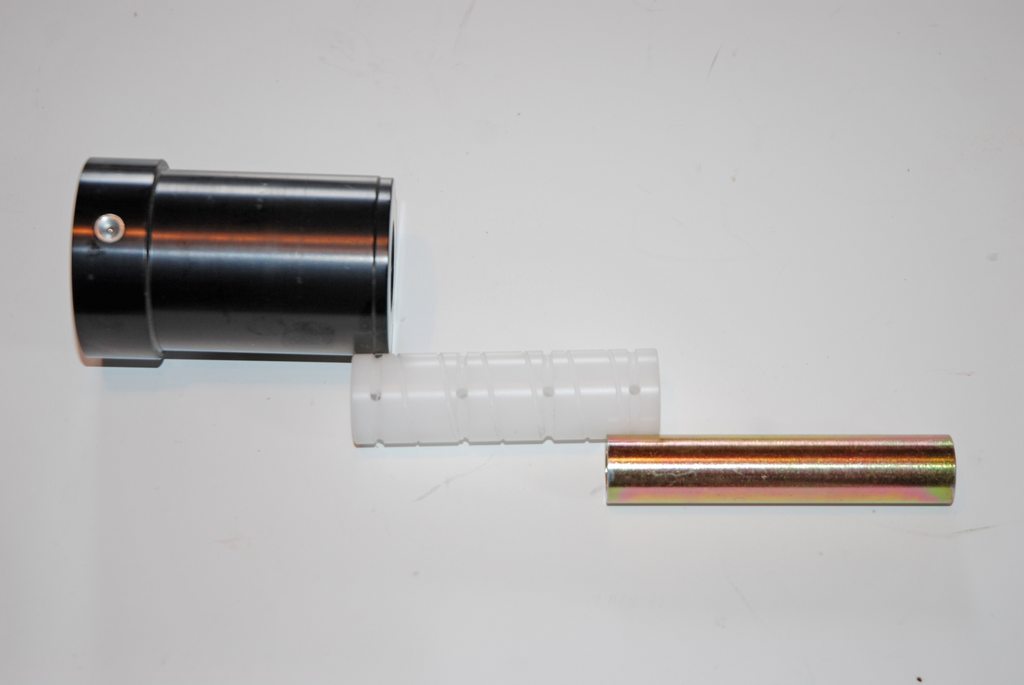
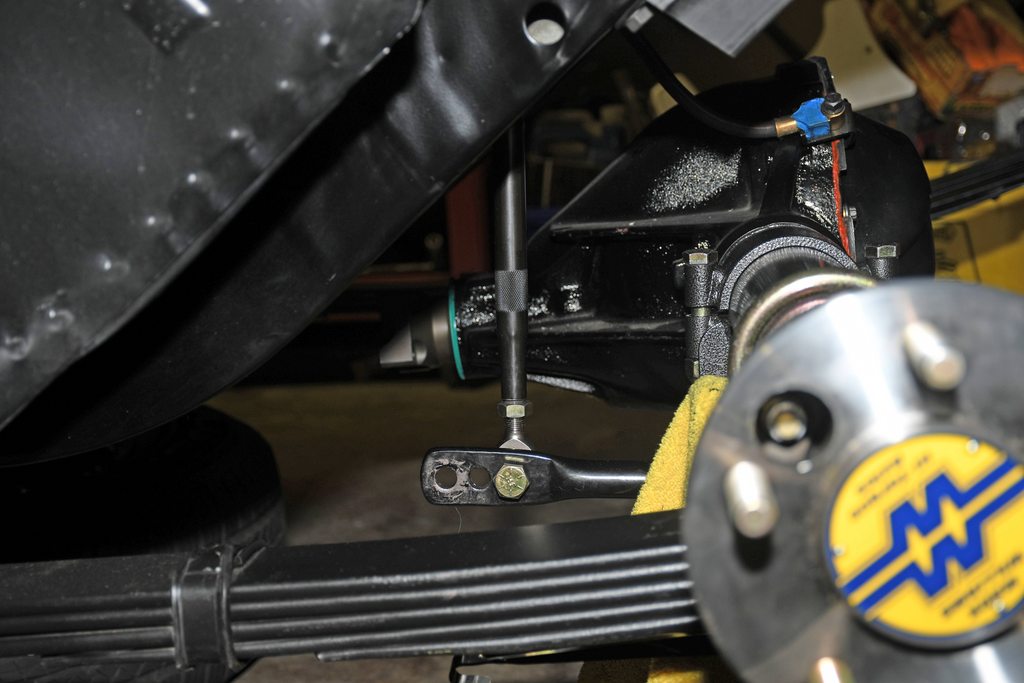
To compliment the springs, I swapped out the OE-style front bushing for a Detroit Speed composite Delrin/aluminum example. The backs of the springs use a conventional Chevy rubber bushing along with a stock shackle. The reason for this is, the rear of the spring in this application is just along for the ride.
I wanted a means to adjust the rear suspension (aside from the shocks which I'll show you down the road). To get there, I bought a rear sway bar kit from Hotchkiss and threw away pretty much everything except the front adjuster mounts and the actual bar. From there, I used a couple of adjustable links from Summit Racing along with four Aurora Teflon lined rod ends. I made up the actual (super heavy duty) housing mounts from pieces sourced from Summit. Also, those are 1/2-inch Calvert Racing u-bolts on the axle housing (no t-bolts). Here's what it looks like from the back:
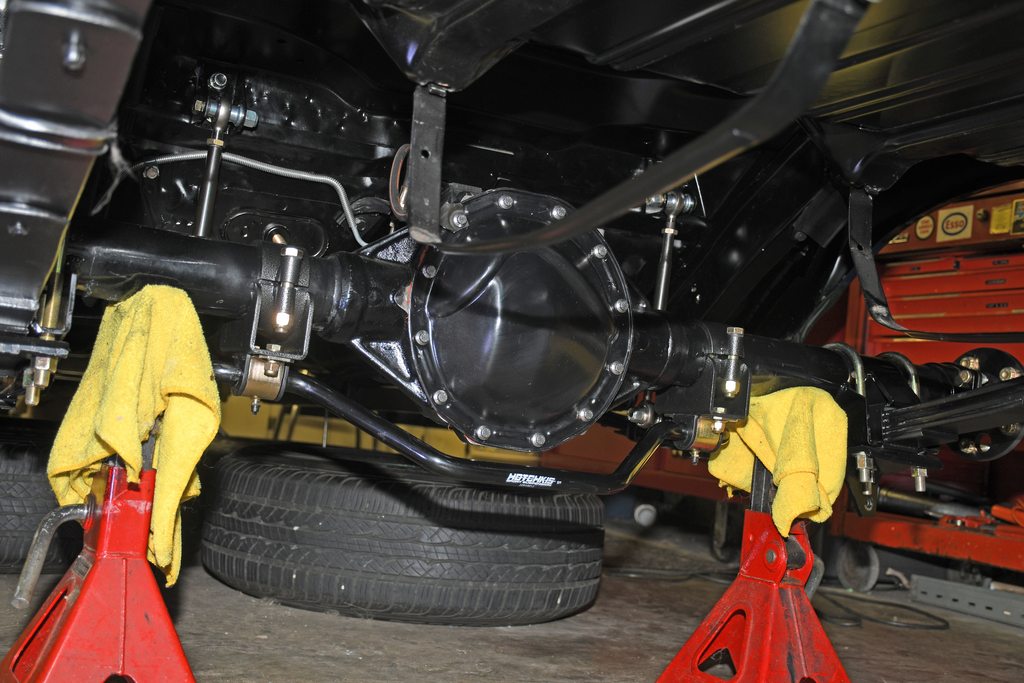
This is a side view. The links can be adjusted for preload. It is possible with this setup to actually change ride height (jack it) from side-to-side. As a result, it can be used to help plant a tire:
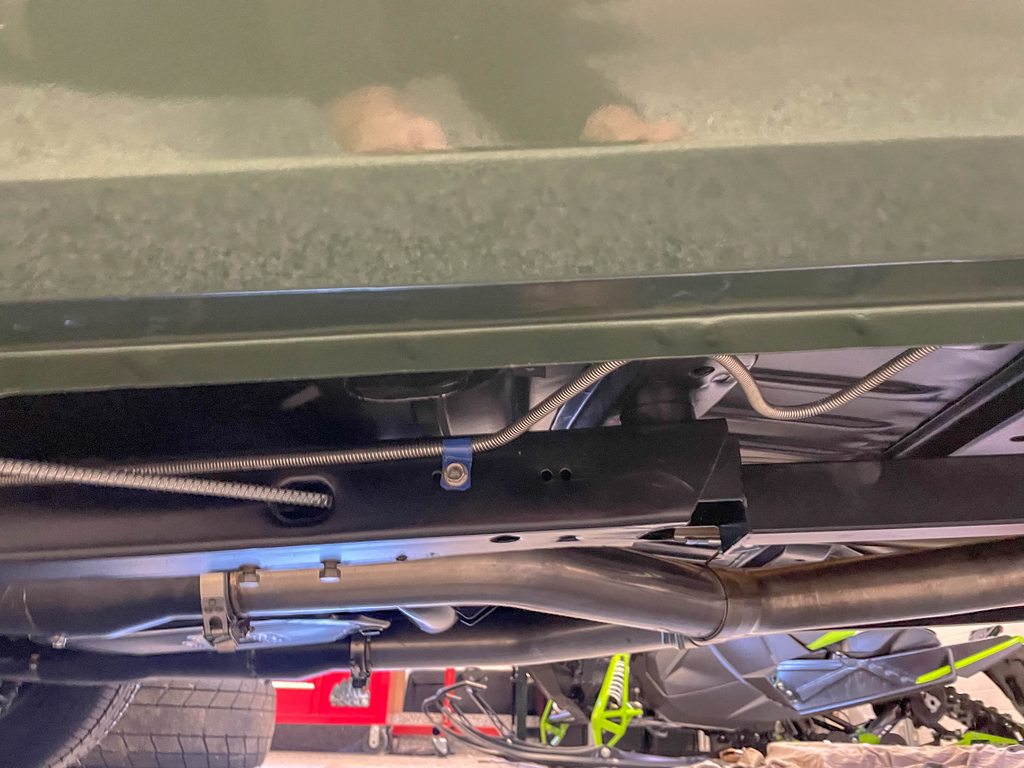
On the bottom side, the subframe was tied to the car spring pocket by way of Competition Engineering frame connectors. The pair of photos attached are recent (today!). You can see I used stainless brake lines along with stainless park brake cables. The exhaust is a modified Hooker 3-inch stainless steel setup for an LS swap. You can see I use V-band clamps to attach the exhaust to the slip on header collectors. Although it might look low in this photo, the exhaust is actually very tight to the floor pan. The lowest part is the 4-inch header collector (necessary for the 2-25-inch primary tubes, but that's another story). These photos should give you a pretty good idea of what the car is like underneath... it's fun working on a car like this...


The following YouTube link (short video) will give you a bit more insight into the basic rear suspension setup:
https://youtu.be/ngqqkQz8PDk
More to come....